
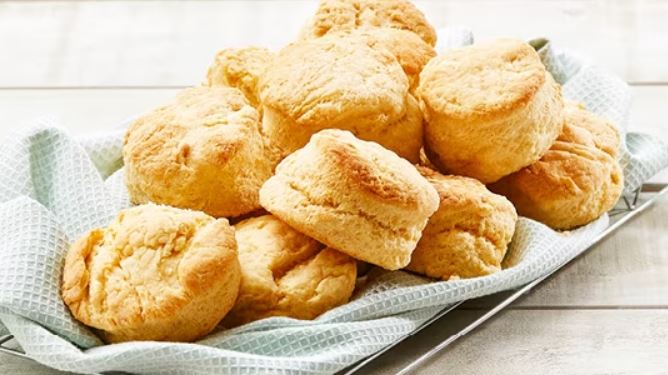

Oven scones, with their inviting aroma and tender crumb, offer a delightful experience that marries the simplicity of classic baking with the indulgence of a well-crafted pastry. These scones, known for their flaky texture and versatile nature, have a history steeped in tradition and innovation. The combination of everyday ingredients and the joy of creating baked goods has made oven scones a beloved treat for generations.
Scones, originally hailing from Scotland, have a history that spans centuries and crosses borders. These baked delights were initially prepared on a griddle, creating a rustic yet satisfying treat. Over time, scones evolved with the introduction of baking powder, allowing them to rise and become fluffier when baked.
The term “oven scones” implies a slight departure from the traditional griddled version, suggesting that these scones are baked instead of cooked on a griddle. This shift demonstrates the adaptability of recipes to modern cooking methods and tools. The use of baking powder, cream of tartar, and Crisco (shortening) reflects the culinary innovations of the 20th century.
INGREDIENTS
- 4 cupfuls flour
- 5 tablespoonfuls Crisco (shortening)
- 1 tablespoonful sugar
- 1/2 teaspoonful salt
- 1 teaspoonful baking soda
- 2 teaspoonfuls cream of tartar
- 1 egg
- Sweet milk
- Optional: currants or raisins
INSTRUCTIONS
- Start by rubbing the Crisco finely into the flour. This process incorporates the fat into the flour, creating a crumbly texture.
- Add sugar, salt, baking soda, and cream of tartar to the flour mixture. These dry ingredients provide flavor and help the scones rise.
- Beat the egg well. Pour half of the beaten egg into a cup and set the other half aside.
- Use half of the beaten egg and some sweet milk to create a soft dough. The milk and egg mixture will serve as the wet component of the dough.
- Knead the dough very lightly on a floured baking board. Over-kneading can result in tough scones, so it’s best to handle the dough gently.
- Divide the kneaded dough into five pieces, shaping each piece into a smooth ball.
- Roll out each ball of dough to a thickness that is not too thin.
- Cut the rolled-out dough into four small cakes. This will yield the individual scones.
- Place the scones on a Criscoed baking tin (greased with shortening). The Crisco helps prevent sticking and adds flavor.
- Brush the tops of the scones with the remaining beaten egg. This step adds a glossy finish to the scones as they bake.
- Preheat the oven to a hot temperature.
- Place the tin with the scones in the preheated oven and bake for approximately ten minutes. The scones should turn a golden color and develop a flaky texture.
- If desired, you can add currants or raisins to the scones for extra flavor and texture.
- Once baked, remove the scones from the oven and allow them to cool slightly before serving.
- Oven scones encapsulate the essence of traditional baking with a modern twist. The combination of simple ingredients and classic techniques results in a treat that delights the senses. These scones carry the legacy of scone-making traditions while adapting to contemporary preferences. Whether enjoyed as part of a cozy breakfast or a tea-time treat, oven scones bring a touch of nostalgia and warmth to every bite.


