
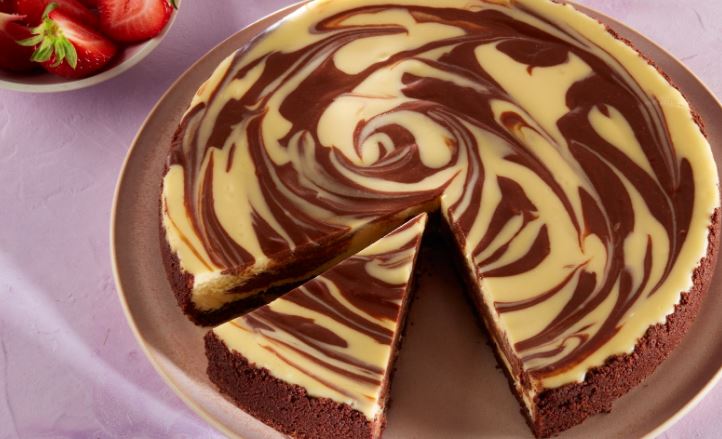

This is a reverse marble cake: The chocolate is dominant and the vanilla batter is swirled through the chocolate.
SERVES 6
INGREDIENTS
CRUST:
- 2 tablespoons unsalted butter, melted
- ½ cup chocolate wafer crumbs
- 1 tablespoon sugar
CHEESECAKE FILLING:
- 2 ounces semisweet chocolate
- Two 8-ounce packages cream cheese, softened
- ½ cup sugar
- 2 large eggs
- 1 teaspoon vanilla bean paste or vanilla extract
- 2 cups water
INSTRUCTIONS
- To make the crust: Line the bottom and sides of a 7-inch springform pan with aluminum foil, pressing it down into the bottom. Coat the aluminum foil with nonstick cooking spray.
- In a small bowl, combine the melted butter, chocolate wafer crumbs, and sugar. Pat the mixture into the bottom of the prepared pan.
- Make a sling for the springform pan and place the pan in the center of the sling.
- To make the filling: In a small glass bowl, melt the chocolate in the microwave on high power for 1 minute. Stir to melt the chocolate and set it aside to cool.
- In the bowl of an electric mixer, cream together the cream cheese and sugar until smooth.
- Beat in the eggs, one at a time, and then add the vanilla bean paste or vanilla extract. Beat the mixture until smooth.
- Transfer ½ cup of the batter to a small bowl and set it aside.
- Beat the melted chocolate into the remaining batter.
- Transfer the chocolate batter to the prepared springform pan, smoothing the top.
- Dollop the reserved vanilla batter over the top of the cheesecake and cut through the batter with an offset spatula to marble it.
- Tightly cover the cheesecake with aluminum foil.
- Pour the water into the pressure cooker and place the trivet in the bottom.
- Use the sling to lower the cheesecake into the pressure cooker and fold the ends over the pan, ensuring they don’t rest on the cheesecake.
- Lock the lid in place and cook at high pressure for 15 minutes.
- Release the pressure naturally and remove the lid, tilting the pot away from you to avoid the escaping steam.
- Use the sling to lift the cheesecake out of the pot.
- Remove the foil from the top and blot any excess water that may have accumulated on top of the cheesecake.
- Cool the cheesecake on a rack.
- Remove the sides of the pan and peel the foil off the sides of the cheesecake.
- Slide a cake spatula under the cheesecake and transfer it to a serving platter.
- Cover with plastic wrap and refrigerate for at least 6 hours or up to 3 days before serving.
- Bring the cheesecake to room temperature before serving.


